No products in the basket.
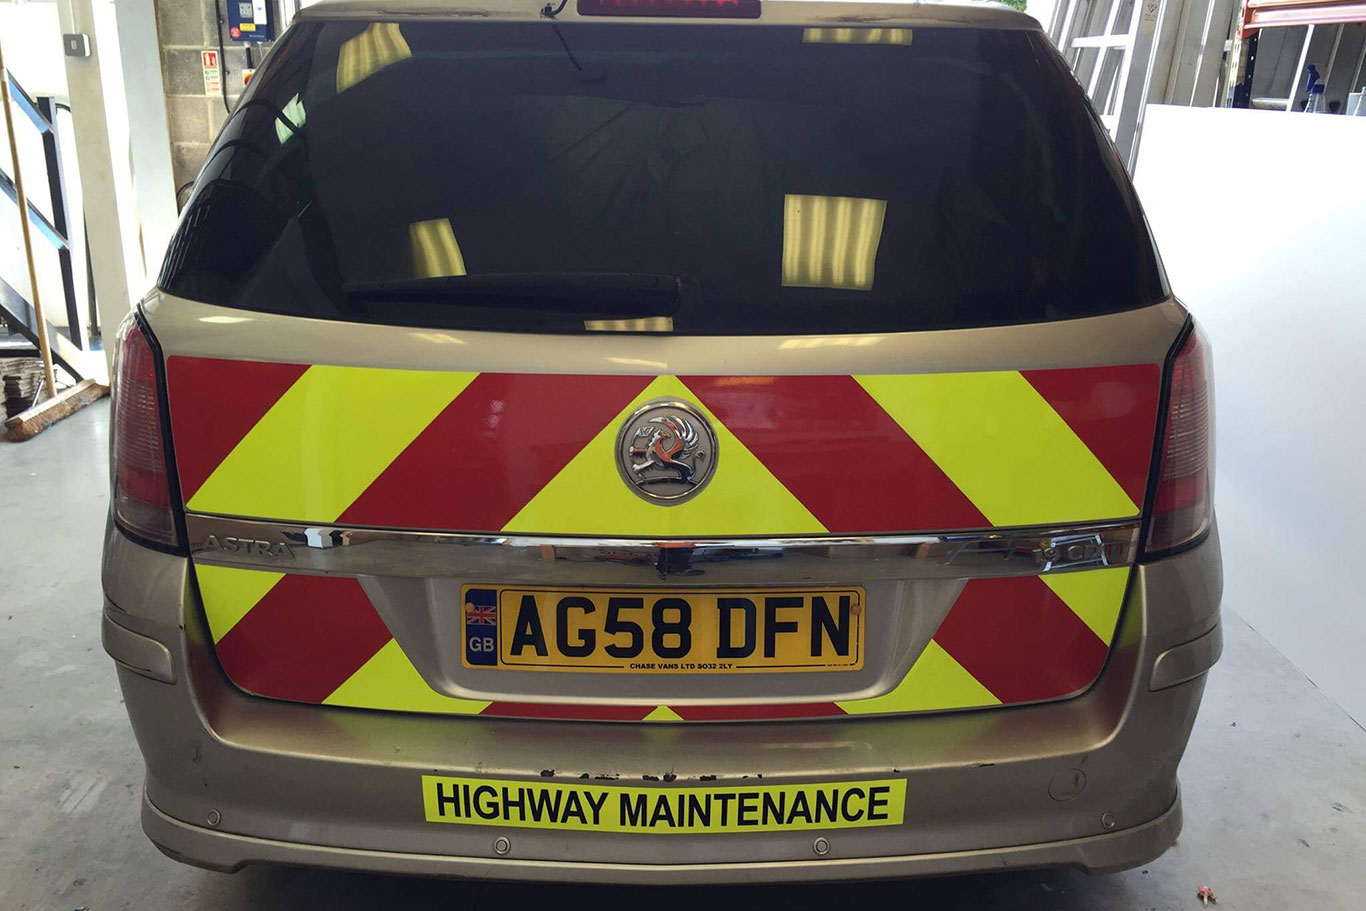
To keep rear chevrons clean and reflective, wash them regularly using a method suitable for the specific vinyl, remove contamination promptly and inspect the material after cleaning. Avoid abrasive tools, harsh chemicals and concentrated pressure around the edges of the markings.
Rear-facing vehicle surfaces collect road spray, salt, mud and traffic film more quickly than many other areas. This layer of contamination can reduce the bright daytime appearance of fluorescent material and prevent headlights from reaching the reflective surface effectively.
Cleaning is therefore part of vehicle safety and maintenance, not simply a matter of presentation. The Department for Transport’s Traffic Signs Manual specifically advises that works vehicles should be kept clean to maintain conspicuity.
A regular cleaning routine also makes it easier to identify fading, peeling, scratches and other damage that may otherwise remain hidden beneath dirt.
Why do rear chevrons need regular cleaning?
Rear chevrons are positioned where they receive a constant build-up of contamination from the road and vehicle itself.
Common sources include:
The airflow behind a van can draw spray and fine dirt onto the rear doors. In wet weather, this may create a grey or brown film across the entire chevron pattern.
Even if the markings remain physically undamaged, this film can reduce contrast and reflection. Approaching drivers may have more difficulty identifying the vehicle in darkness, rain or poor visibility.
Regular cleaning helps preserve:
Allowing heavy dirt to remain for long periods can make it harder to remove and may conceal defects that require attention.
How often should rear chevrons be cleaned?
There is no fixed cleaning interval suitable for every vehicle. Frequency should be based on how quickly the markings become dirty and the conditions in which the vehicle operates.
A van used mainly on clean urban roads in dry weather may require less frequent washing than a vehicle working on:
Drivers should inspect the rear of the vehicle before use. If the pattern, lights, maintenance sign or number plate is difficult to see, the relevant areas should be cleaned before the van begins work.
During winter or prolonged wet weather, cleaning may be required several times between scheduled full-vehicle washes. A quick clean of the rear-facing safety equipment can be more important than waiting until the whole van is washed.
Fleet policies should allow drivers to report and address dirty markings rather than treating cleaning as a depot-only task.
What is the safest way to clean rear chevrons?
The instructions for the specific material should always take priority. Different reflective films may have different requirements relating to cleaning products, water temperature and pressure-washing equipment.
A sensible general process is as follows.
1. Park the vehicle safely
Choose a suitable cleaning area away from moving traffic. Make sure there is adequate drainage and enough space to access the rear doors without creating a hazard.
If possible, avoid cleaning vinyl when the panels are extremely hot from direct sunlight. Rapid drying can leave marks and make the cleaning solution harder to control.
2. Inspect the markings before washing
Look for loose edges, splits, bubbles and missing sections. If the vinyl is already damaged, high-pressure water or vigorous rubbing may make the problem worse.
Pay particular attention to:
Recording existing damage before cleaning can help distinguish it from anything discovered afterwards.
3. Rinse away loose dirt
Use clean water to remove loose mud, grit and salt before wiping the surface.
This step is important because rubbing dry grit across the material can create scratches. Allow stubborn mud to soften rather than trying to scrape it away.
4. Use a suitable cleaning solution
Apply a vehicle-cleaning product that is compatible with the reflective material. Follow the dilution and use instructions supplied with the product.
A stronger solution is not necessarily more effective. Excessively aggressive chemicals may affect the vinyl face, adhesive or surrounding paintwork.
If the product’s suitability is uncertain, check with the marking supplier or test it in a small, inconspicuous area.
5. Clean with a soft cloth or sponge
Gently wash the markings using a clean, soft tool. Work across the surface without forcing the cloth against vinyl edges.
Do not use:
Use separate clean equipment where possible. A sponge that contains grit from the lower bodywork can scratch the chevrons.
6. Rinse the surface thoroughly
Remove all detergent and loosened contamination. Cleaning residue can leave a dull film that reduces the apparent brightness of the markings.
Make sure residue does not collect around handles, hinges or lifted edges.
7. Allow the markings to dry
Dry the surface using a suitable soft cloth or allow it to air dry in a clean environment.
Once dry, inspect the chevrons again. Fading, clouding and scratches are often easier to identify on a clean surface.
Can you pressure wash rear chevrons?
Pressure washing may be permitted for some vehicle marking materials, but it must be carried out in accordance with the manufacturer’s instructions.
The main risk is forcing high-pressure water underneath the edges of the vinyl. This can weaken the bond, introduce moisture and cause a small lifted section to peel further.
Poor pressure-washing technique may also damage the face of the reflective material.
Before pressure washing:
A powerful pressure washer should not be used to compensate for infrequent cleaning. Regular gentle washing usually allows dirt to be removed with less force.
Automatic vehicle washes may also use strong chemicals or stiff brushes. Check whether the system is suitable for the fitted markings before using it regularly.
Which cleaning products should be avoided?
The correct product depends on the vinyl, so businesses should retain the supplier’s care information after a kit is installed.
Products that may cause problems include:
A chemical being safe for painted bodywork does not automatically make it suitable for reflective film.
If fuel, oil, tar or another difficult substance has contaminated the markings, ask the supplier which cleaning method is appropriate. Experimenting with increasingly strong solvents can permanently damage the surface.
How should difficult contamination be removed?
Some deposits require more attention than ordinary road dirt.
Road salt
Rinse salt away thoroughly with clean water. Salt can collect around edges and panel gaps, so check these areas carefully.
During winter, frequent rinsing may be needed even when a full wash is not practical.
Mud and dried soil
Soften dried mud with water before wiping it away. Scraping can scratch the vinyl or damage its surface structure.
Bird droppings
Remove bird droppings as soon as reasonably practical. Allowing them to remain can stain or affect vehicle finishes. Soften the deposit and clean it gently rather than rubbing it across the material.
Tree sap
Tree sap can be difficult to remove using ordinary shampoo. Consult the material supplier before using a specialist solvent or sap remover.
Oil and fuel
Remove contamination promptly using a compatible method. If the vinyl becomes stained, softened or discoloured, it should be inspected for permanent damage.
Adhesive residue
Do not apply an adhesive remover without confirming that it is suitable for reflective material. Some solvents can cloud or weaken the face film.
How can you check the chevrons after cleaning?
Cleaning provides a useful opportunity to assess whether the markings remain serviceable.
Begin with a daylight inspection. Look for:
Next, check the markings under suitable low-light conditions using a directed light source. View the pattern from a safe position and look for sections that appear significantly duller than the surrounding material.
A low-light inspection should assess the complete rear of the vehicle, including:
Cleaning cannot repair material that has faded, cracked or lost reflective performance. If a clean section remains noticeably dull or inconsistent, replacement may be necessary.
Can polishing make rear chevrons more reflective?
Polishing should not be used as a general method of restoring reflective markings.
Reflective films have a specialist surface structure. Abrasive polish may damage this structure, while waxes and other coatings can leave a residue that changes the material’s appearance.
A temporary shine does not demonstrate improved retroreflectivity. It may simply change the way the surface reflects ambient light.
Before applying any polish, wax, ceramic coating or protective treatment over chevrons, check whether the material manufacturer approves it. If approval cannot be confirmed, keep the treatment away from the markings.
Permanent fading or reflective deterioration normally requires replacement rather than polishing.
How can drivers protect chevrons during everyday work?
Cleaning is only one aspect of chevron maintenance. Many markings are damaged by the way equipment is loaded, stored or used.
Drivers and fleet operators should prevent:
Rear steps, handles and the lower parts of doors often experience the most damage. These areas should be checked more frequently.
If the vehicle’s equipment changes, confirm that the new arrangement does not hide the chevrons, lights or number plate.
Do Chapter 8 chevrons need special maintenance?
Chapter 8 chevrons should be maintained so that the vehicle continues to provide the intended conspicuity. The guidance does not treat cleanliness as optional.
A road-working vehicle may be exposed to faster traffic, poor weather and night-time conditions. Dirt or damage that appears minor in a depot can significantly affect how early the vehicle is recognised on the road.
Fleet maintenance should therefore cover:
Suitable Chapter 8 chevrons are one element of the overall vehicle specification. They should be inspected alongside beacons, lights and other visibility equipment.
When should rear chevrons be replaced?
Cleaning should restore markings affected by ordinary surface dirt. It cannot correct permanent material damage.
Replacement should be considered when:
A small, isolated repair may be possible if a compatible matching material is available. However, new sections can appear much brighter than an old, faded kit.
If deterioration affects several areas, replacing the full chevron kit may produce a more consistent result.
How should fleets organise chevron cleaning?
A clear system is more reliable than leaving cleaning entirely to individual preference.
A fleet process can assign responsibility for:
Drivers should know where cleaning equipment is stored and how to report markings that remain dull or damaged after washing.
Photographs can support the process. Taking pictures from a consistent position after scheduled cleaning helps managers identify gradual fading and recurring damage.
Frequently Asked Questions
Can rear chevrons be cleaned with washing-up liquid?
A household detergent should not automatically be assumed suitable. Use a vehicle-cleaning product approved for the reflective material or follow the supplier’s care instructions.
How often should chevrons be cleaned in winter?
Clean them whenever road salt, spray or mud begins to reduce their visibility. A working vehicle may need its rear safety markings rinsed more frequently than the rest of the bodywork.
Can a car wash damage reflective chevrons?
Some automatic washes use strong chemicals or brushes that may affect vinyl. Confirm that the system is suitable for the fitted material before using it regularly.
Should you clean around peeling edges?
Yes, but take care not to force water or cleaning equipment underneath them. Report the damage and arrange repair or replacement rather than allowing it to spread.
Can scratches be polished out of reflective vinyl?
Abrasive polishing may damage the material further. Deep scratches that affect appearance or reflection normally require assessment and possible replacement.
Why do clean chevrons still look dull?
The material may have faded, become scratched or lost reflective performance. Clouding, delamination and UV exposure can also create a permanently dull appearance.
Should newly applied chevrons be washed immediately?
Follow the installer’s instructions. The adhesive may need time to establish before the vehicle is washed, particularly with pressure-washing equipment.
Can damaged chevrons be covered with another sticker?
Applying new material over damaged vinyl can produce poor adhesion and an uneven finish. The damaged section should normally be removed and the underlying surface prepared before replacement.
A Simple Step-by-Step Chevron Care Routine
Keeping rear chevrons clean preserves their daytime contrast, supports night-time reflection and makes physical damage easier to identify. The most effective routine combines regular gentle cleaning with inspection and prompt defect reporting.
The specific care instructions for the fitted material should always be followed. If chevrons remain faded, dull, cracked or peeling after cleaning, replacement is likely to be more appropriate than further aggressive treatment.
All About Chevrons supplies vehicle-specific safety markings for professional vans and fleets. If your existing chevrons are damaged or no longer performing effectively, contact the team for help identifying a suitable replacement.
Phone: 023 9252 0333
Email: info@allaboutchevrons.com
Find out more: All About Chevrons